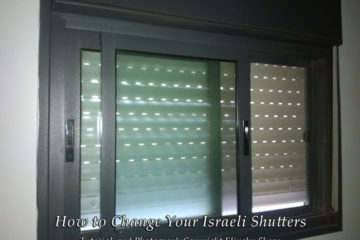
If you’re new to Israel – the word Tris will already be a familiar one. Plural – Trissim, refers to those “wonderful” Israeli shutters that come standard with every apartment. Yours will look quite similar to the one pictured in the photograph above.
If you’ve lived in your apartment for more than six months, you’ll also know that those shutters can start wearing out(!) In fact, there are many tenants who will find themselves on the receiving end of an upset landlord at the moment they break (which of course is a perfectly normal thing to happen!) Don’t worry! You’ve done nothing wrong! They’re easy to fix, and there’s really no need for anyone to contact their landlord about the problem! In all likelihood, however, it will be up to the lessee to pay for the “damage”. It’s okay! There’s no real damage anyway! It’s really just like when a light-bulb blows and one has to install a new one. No need to tell the landlord. Just replace it, and you’ll have light again! For those not too “good with their hands” – you may feel like the world just fell apart and not know what to do. Actually, the shutters are relatively easy to fix – when you know how!
How the Tris Works
This is how it all works, and what you need to know about Trissim:
The first thing to know is the way they operate. The actual Tris is a “beautiful” pale greenish colour made up of planks that actually fit into each other. (Don’t worry! If you don’t go for the “beautiful” green colour, you can have a company actually design any picture on them that you’d like. When you close the Tris completely, you’ll get to see the image in its fullness. Enjoy!) At times, these planks can shift out and if you’re lucky enough to ever get a worker in who wishes to fiddle with them for their own purposes (such as installing security bars behind the Tris,) you may find yourself with broken planks at the end of the day too. Don’t worry though! They aren’t too difficult to fix. For this purpose, simply slide each plank into the slit that links them together.
You’ll also notice there are two main screws at the bottom of each Tris with a rubber attached. They are there so that when you raise the Tris, it ends up hitting this rubber instead of causing the entire Tris to roll itself up into the box it sits in at the top of the wall just above. It hides itself in there for reasons of cleanliness. In any case… should you ever need to pull them back again, you’ll be able to easily open the top (see later) and find everything just where it had disappeared to! Nevertheless, don’t pull on the Tris straps (Retzuot) too strongly, otherwise you may end up eventually breaking those rubbers and need to repair them as well!
Back to the main Tris. As you pull the Retzuot to lift the shutters up and down, be aware that they are made with a definite lifespan when they will wear out completely. Indeed, each pull rubs on the straps causing them to become weaker and weaker (friction!) until within as short a time as six months, the entire strap can wear itself out. When this happens, you’ll know all about it. As you pull the strap (for its final time), the strap will break, usually at that point in time when the Tris is raised to its full height (Murphy’s law!) As it does so, the entire shutter will come tumbling down with a loud CRASH! You may get a fright from the sound and think you’ve broken everything – and that the landlord will sue you. The latter is a possibility – who knows(?) (though you’ve done nothing wrong!) – so it’s best to keep it to yourself and just fix it yourself!
Getting Help – or Fixing Them Yourself!
You can have someone come through to do it for you. There are plenty of “handy” people in Israel who’ve neither learned anything about handy work nor even attempted to fix one of these things before – who will be glad to charge you from as little as 150 shekel to as much as 300 shekel to fix the strap. You can do it yourself (or you’re welcome to call me to help… I’ll let you know my own charge after being contacted!)
So much for our intro. Stay tuned for a further post where we will guide you step by step through the process of fixing your Retzuot into place, making sure your Tris will serve you well for another six months (or maybe – if you’re lucky, even more!